So you woke up this morning and decided that you felt a little handy around the house today.
The general aim of making home improvements is to enhance beauty with intricate designs, produce comfort and to do general upgrades. When it comes to the improvement of bathrooms, many people opt to do the upgrades by tiling. Yet, many people lack the know-how to undertake this improvement method and will end up hiring outside help or not making any changes at all. You can save that cost of labor and make your bathroom look more appealing with only a pair of overalls, one weekend and this simple guide.
Material Options
You cannot begin the task ahead when you do not have the necessary materials. Nowadays, the tiles are produced in very beautiful designs, shapes and textures. Because of this, you may be tempted to pick on a pile of tiles just because “they are pretty” or “they feel so smooth”. You need to analyze each design and consider those that are suitable for bathrooms- since they will be in constant contact with water. Putting factors such as strong, non-slippery, and water-resistant qualities will enable you to pick out the most suitable tiles for your bathroom - you may now consider how “pretty” the tiles are after factoring in the main qualities. Also ensure that your batch has the same colors.
Basic Preparations
You are embarking on a new task to spruce up your bathroom – on your own. Having a little advice from builders can put you at an advantage. Some may suggest that you soak the tiles in water for some time before using them on your bathroom. This enables trapped air in your tiles to escape and further prevents them from absorbing the ground water. The amount of time for soaking will be based on the tiles’ material. For instance, porcelain requires 30 minutes while ceramic would require about 15 minutes. The tile size also matters since bigger tiles are presumed to occupy a bigger space. For a small bathroom, get many small-sized tiles and reserve the bigger tiles for larger spaces.
Get To Work
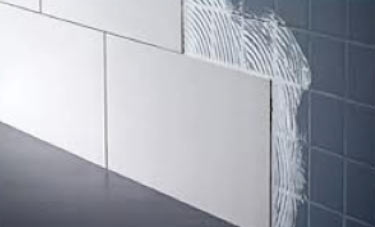
The reason for picking out a same-color batch is to ensure consistency – since you may not be able to keep a constant multiple-colors flow while mix-matching. Make good use of spacer to place the tiles in an equal arrangement – you do not want to have crooked-looking tiles. Waterproof adhesive is advisable for this purpose. Ensure that it is also strong and flexible for areas that may experience movement. Use a spirit level to level your work and balance any unleveled tile with a rubber hammer and a piece of wood. Once done, grout the tiles to make a smooth surface finish and leave them for more than a day and untouched. You can use floral-designed tiles in between your other tiles to enhance their beauty. You just need to find the right position to place these tiles.
- Justin
